Proudly serving Phoenix, Scottsdale, Mesa, Chandler, Glendale, Gilbert & surrounding areasCall or Text 24/7: 602-449-9183
Aerial view of suburban homes, desert vegetation, and distant mountains in Phoenix, AZ.

Large Format Tile Installation for Floors and Walls in Phoenix, AZ

Phoenix Tile Flooring installs large format tile in Phoenix for floors, showers, bathrooms, backsplashes, patios, and commercial interiors. Our crews handle 24x48 and 48x48 porcelain along with ceramic, glass, marble, travertine, slate, and limestone. Supporting work can include dustless tile removal, substrate leveling, waterproofing, heated-floor installation, tile repair and replacement, and grout repair or regrouting. Each layout is planned around the room, material, and existing substrate rather than treated like a standard small-tile job.

Phoenix slabs can move with expansive soils and temperature cycling, while open floor plans make lippage and crooked lines especially noticeable. We check flatness, cracks, moisture, and adhesive residue before setting tile. Installation follows TCNA handbook methods and relevant ANSI A108/A118 standards, with large-and-heavy tile mortar, back-buttering, and coverage checks. That preparation helps oversized tile stay flat, supported, and aligned through doorways, wall transitions, and wet areas.

Projects can include crack-isolation membrane, self-leveling underlayment or grinding, sheet or liquid waterproofing, and movement joints where conditions require them. A written estimate follows a review of the space, tile selection, pattern, access, and substrate condition.

Phoenix Tile Flooring provides large format tile installation across Phoenix and the surrounding metro, including Scottsdale, Tempe, Mesa, Chandler, Glendale, and Paradise Valley.

★ ★ ★ ★ ★4.9/5.0 Customer Rating · 26 Years of Tile & Flooring Experience · Thousands of Projects Completed · Licensed, Bonded & Insured · Serving Homeowners & Businesses

Large Format Tile Options & Benefits

What Is Large Format Tile Installation?

Large format work includes commonly requested 24x48 and 48x48 porcelain as well as jumbo slabs beyond those sizes. The broad faces reduce the number of grout lines, but they demand flatter substrates, fuller mortar contact, and more controlled handling than smaller tile.

Phoenix housing growth over the last two decades has increased demand for oversized tile in open-plan homes and commercial spaces. With over 1.6 million residents inside city limits and roughly 5.19 million across the metro, the volume of construction and remodeling has made trained large-format installation especially important. Builders across the Sun Corridor from Buckeye to Queen Creek also specify 24x48 porcelain as an upgrade option.

Fewer grout lines create a cleaner field across open-concept great rooms, while large porcelain resists the fading and etching concerns associated with natural stone under direct desert sun. Straight-lay fields, diagonal layouts, and herringbone patterns in select planks are planned before setting begins so cuts remain balanced and lines carry cleanly through transitions.

Benefits for Phoenix Floors and Walls

The visual simplicity of oversized tile works best when installation details support the finished design. Material choice, substrate preparation, layout, mortar coverage, and movement accommodation all contribute to a surface that looks intentional and performs as designed.

  • Fewer grout joints across open great rooms and long floor runs
  • Less grout to clean and reseal in bathrooms and showers
  • Porcelain that resists fading and etching under strong desert sun
  • Balanced edge cuts planned before mortar is mixed
  • Leveling systems that help control lippage while mortar cures
  • Back-buttering and coverage checks that reduce unsupported voids
  • Waterproofing and proper slope for wet-area installations
  • Options for residential, commercial, indoor, and exterior applications
Large Format Tile Services

Installation and Supporting Services

Large format installation often involves more than setting the finish tile. Phoenix Tile Flooring coordinates the preparation, removal, waterproofing, layout, setting, repair, and grout work needed for floors, walls, wet areas, patios, and commercial interiors.

Large Format Floor Installation

Large format floor tiles with leveling clips and wedges installed at a construction site in Phoenix, AZ.

Floor installations begin with slab-flatness checks and a balanced layout for the room, doorways, islands, and perimeter cuts. Self-leveling underlayment, grinding, crack isolation, large-and-heavy tile mortar, and leveling clips are used when the substrate and tile format call for them.

Request Estimate

Shower and Bathroom Tile Installation

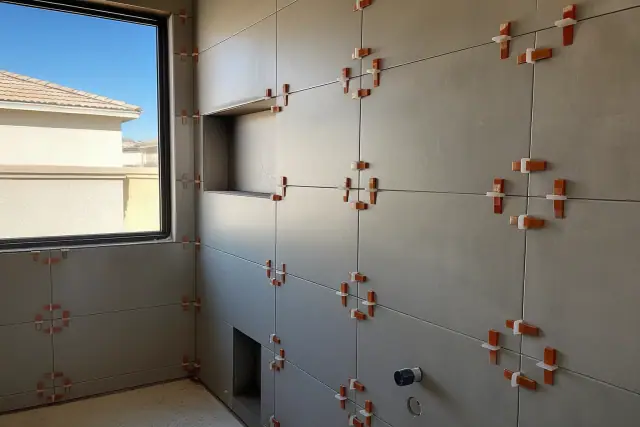
Large format tiles with leveling clips and wedges installed in a bathroom renovation in Phoenix, AZ.

Large panels reduce grout joints in showers and bathroom floors, but the assembly still depends on waterproofing and drainage. Sheet or liquid membranes meeting ANSI A118.10 go in before tile, and shower pans are sloped to the drain at a minimum 1/4 inch per foot.

Request Estimate

Kitchen Backsplash Installation

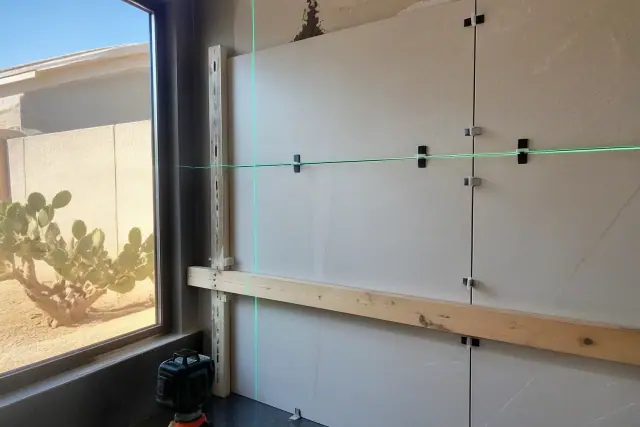
Laser level beam projected over a large format tile backsplash installation in a Phoenix, AZ home.

Large backsplash panels, including 12x24 and larger subway-style formats, reduce joints behind sinks and cooktops where grease and moisture collect. Layout planning aligns cuts around outlets, cabinets, and visible edges before the panels are set.

Request Estimate

Dustless Tile Removal

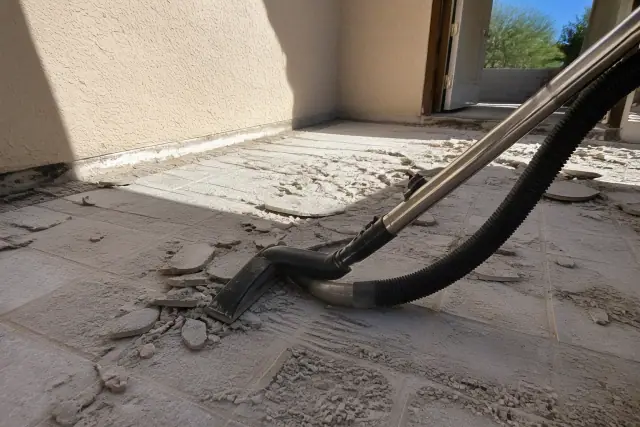
Dustless tile removal with an industrial vacuum hose on a sunny jobsite in Phoenix, AZ.

HEPA-filtered vacuum extraction connects directly to demolition equipment to help contain silica dust during removal. After the old tile is lifted, the exposed surface is checked for cracked mortar beds, damaged subfloor, plumbing concerns, and other conditions that must be corrected before new tile is installed.

Request Estimate

Tile Repair and Regrouting

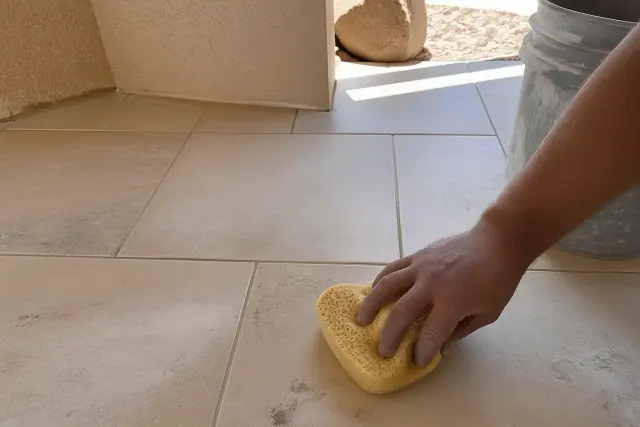
Damp sponge wiping excess mortar from newly regrouted stone tile flooring in a Phoenix, AZ home.

Individual cracked tiles may be replaced when matching material is available and the surrounding grout remains sound. Selective grout repair or full regrouting can address failed joints, while widespread cracking calls for a substrate diagnosis before cosmetic replacement.

Request Estimate

Outdoor and Commercial Tile Installation

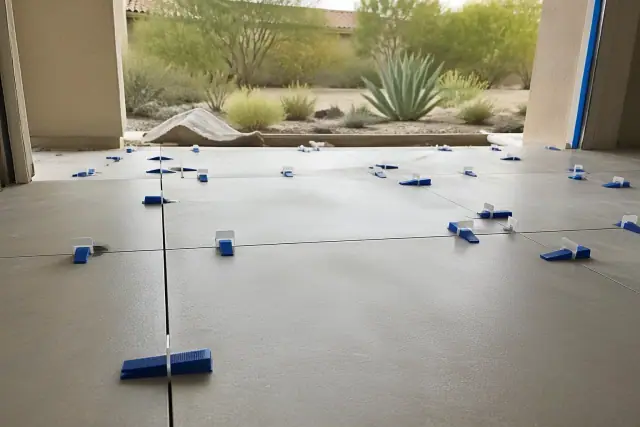
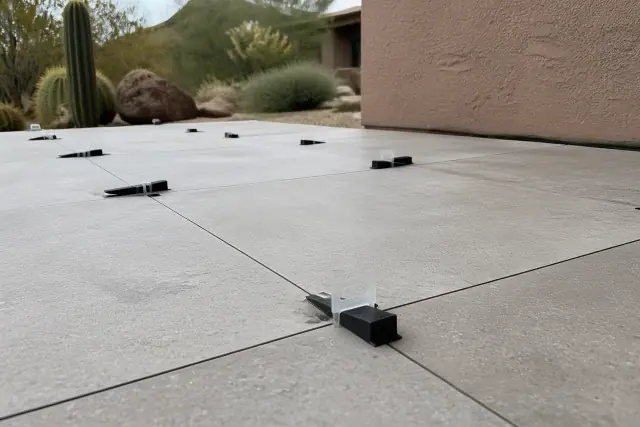
Plastic leveling clips and wedges between large-format patio tiles during a tile installation in Phoenix, AZ.

Patios require exterior-rated porcelain, drainage slope, and mortar and grout selected for heat, UV exposure, and monsoon moisture. Commercial buildouts receive the same substrate, layout, coverage, and movement-joint planning used for residential large-format work.

Request Estimate
Tile and Assembly Options

Large Format Tile Options

The right assembly depends on tile size, material, room use, traffic, direct sun, moisture exposure, and the condition of the existing slab or subfloor. Porcelain, ceramic, glass, and natural stone each require compatible mortars, cutting methods, joint details, and finishing steps.

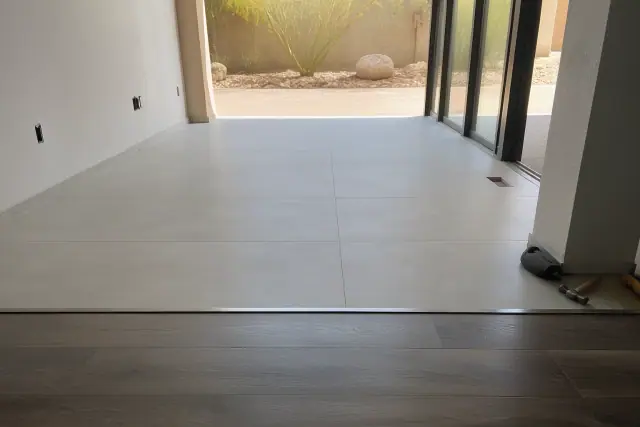
Completed 24x48 porcelain tile installation with a transition strip to wood flooring in a Phoenix, AZ home.

24x48 Porcelain Tile

The 24x48 format creates a broad, low-joint field that suits Phoenix great rooms, kitchens, bathrooms, and commercial interiors. It still requires large-format mortar, full bedding, a planned layout, and substrate flatness beyond what standard tile can tolerate.

  • Straight-lay or diagonal fields planned around room center
  • Balanced cuts at walls, doorways, islands, and transitions
  • Large-and-heavy tile mortar rated for oversized porcelain
  • Back-buttering in addition to troweling the substrate
  • Leveling clips that hold neighboring edges flush during cure
Request Estimate
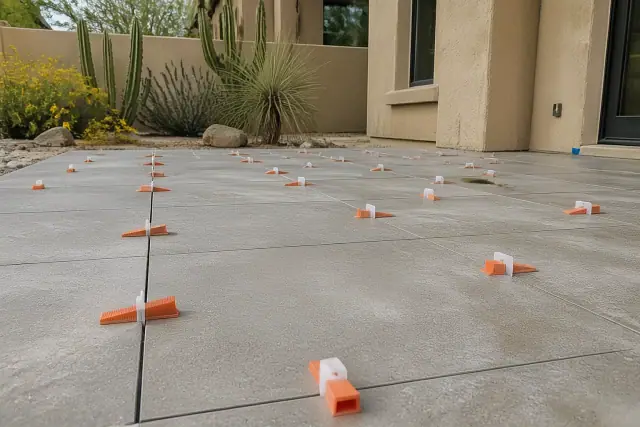
Large format tile installation with leveling clips and wedges on a jobsite in Phoenix, AZ.

48x48 and Jumbo Porcelain

Formats at 48x48 and beyond need specialized handling because weight, breakage risk, and mortar coverage increase with tile size. The surface must be exceptionally flat before these panels are moved into position.

  • Two-person handling for large, fragile porcelain pieces
  • Suction-cup carrying systems for controlled placement
  • Wet saws with blades rated for large porcelain
  • Scoring-wheel or water-jet approaches for chip-sensitive cuts
  • Coverage checks performed during setting, not after cure
Request Estimate
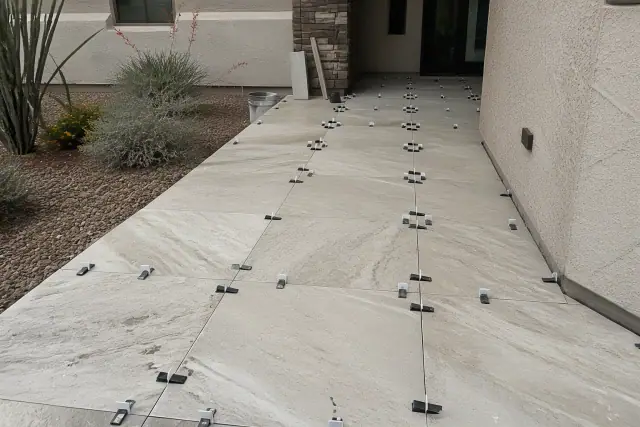
Large format natural stone tiles with leveling clips and wedges on a jobsite in Phoenix, AZ.

Natural Stone in Large Formats

Marble, travertine, slate, and limestone are porous, softer, and heavier than porcelain, so mortar, sealing, cutting, and substrate-load decisions change with the stone. The installation plan also accounts for the material's sensitivity to etching and staining.

  • Marble selected and handled for its softer finished face
  • Travertine installed with stone-compatible setting materials
  • Slate planned around natural variation and thickness
  • Limestone protected with appropriate sealing steps
  • Natural stone sealed before and after grouting
Request Estimate
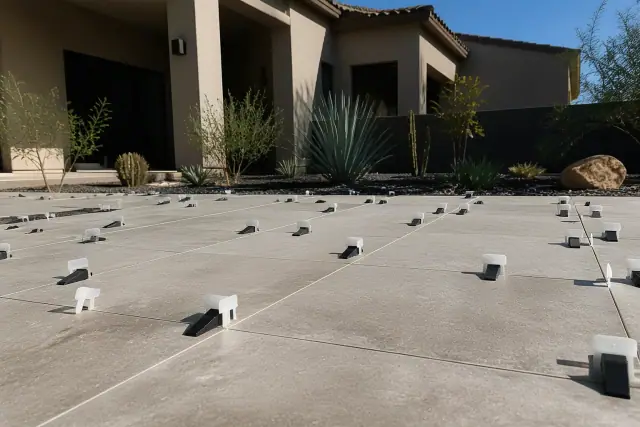
Large format tiles with leveling clips and wedges installed on a residential patio in Phoenix, AZ.

Outdoor and Patio Tile

Phoenix patio tile must handle intense surface heat, UV exposure, and sudden monsoon drainage demands. Exterior-rated porcelain and installation materials are paired with slope and movement details suited to those conditions.

  • Low-water-absorption porcelain rated for exterior use
  • Drainage slope that directs water away from the tiled field
  • Exterior-rated large-and-heavy tile mortar
  • Grout selected for UV and weather exposure
  • Expansion details planned for temperature-driven movement
Request Estimate
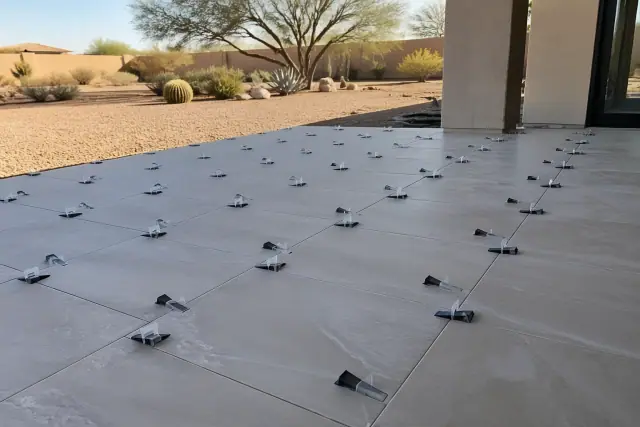
Leveling clips and wedges between large format tiles on a jobsite in Phoenix, AZ.

Specialty Interior Assemblies

Specialty interiors may combine large tile with glass or ceramic accents, heated floors, waterproofed wet areas, or commercial traffic requirements. Each component is integrated into the substrate and setting plan instead of added after tile work has started.

  • Glass and ceramic accents coordinated with the field layout
  • Heated-floor installation incorporated below the tile assembly
  • Sheet or liquid waterproofing for showers and wet areas
  • Slip-resistant porcelain selected for bathroom floors
  • Commercial layouts planned around traffic and transitions
Request Estimate
Finding the Right Fit

Choosing the Right Installation Approach

Tile format is only one part of the decision. The room, substrate, wet or dry exposure, traffic, direct sun, pattern, and edge conditions determine whether the project needs leveling, crack isolation, waterproofing, specialized handling, or exterior-rated materials. Reviewing those conditions first helps align the design with a practical installation scope.

TCNA and ANSI Methods

Crews train on TCNA handbook methods and ANSI A108/A118 setting standards used in residential and commercial specifications. Mortar, membrane, coverage, and movement-joint decisions follow the applicable method, including ANSI A118.15 large-and-heavy tile mortar and TCNA EJ171 movement-joint guidance.

Phoenix Slab Experience

Work in Ahwatukee, North Phoenix, Arcadia, Encanto, and the Willo Historic District has included new construction and remodel conditions. Slab settlement, expansive-soil movement, old adhesive, and temperature cycling are evaluated before choosing grinding, self-leveling underlayment, crack isolation, or repair.

Large-Format Equipment

Suction-cup carriers, large-format wet saws, scoring tools, water-jet cutting approaches, leveling clips, and large-notch trowels support accurate handling and setting. HEPA-connected demolition equipment also prepares occupied homes and commercial spaces for new work with better dust control.

What Sets the Work Apart

Why Choose Phoenix Tile Flooring for Installation?

Large-format mistakes can become visible within the first year when slab prep, mortar coverage, or movement joints are overlooked. Phoenix Tile Flooring plans those details before installation and builds on a licensed, code-compliant foundation consistent with Arizona Registrar of Contractors requirements. Residential remodel and commercial buildout experience along the Loop 101 corridor adds practical context for varied substrates, slopes, and layouts.

Request Installation Estimate

Uneven Slabs and Lippage

A substrate that is not flat can force neighboring tile edges to sit at different heights. Straightedge checks, grinding or self-leveling where needed, and leveling clips help keep rectified tile within the recommended 1/32 inch lippage tolerance.

Hollow Spots and Voids

Skipped back-buttering or incomplete mortar transfer can leave unsupported areas below a large tile. Those voids sound hollow and can crack under point loads from dropped cookware, furniture legs, or other concentrated impacts.

Slab Movement and Cracking

Expansive soils, settled slabs, and temperature-driven movement can telegraph cracks through an oversized tile field. Crack-isolation membrane and TCNA EJ171 movement joints at perimeters, doorways, and large runs help accommodate known movement conditions, with interior fields generally planned at 20 to 25 feet.

Poor Layout and Edge Cuts

Starting at one wall without a dry layout can leave narrow slivers at the opposite edge and make lines drift through doorways. Centerlines, balanced cuts, and a square check establish the pattern before mortar is mixed.

Waterproofing Gaps

Large panels reduce grout joints, but they do not replace a complete wet-area assembly. Missing membrane coverage or incorrect shower-pan slope can trap water, so sheet or liquid waterproofing and drainage details are completed before tile setting.

Exterior Heat and Drainage

Dark patio materials can reach extreme surface temperatures, while monsoon rain demands fast drainage. Exterior-rated porcelain, compatible mortar and grout, deliberate slope, and movement joints address the combined heat, UV, and water exposure.

How It Works

Our Large Format Tile Process

Each installation moves from substrate evaluation through layout, setting, cure, grout, and final review. The sequence protects the finished design by resolving flatness, cracks, moisture, coverage, and movement details before they become visible failures.

01.

Assess Substrate Flatness

A 10-foot straightedge is used to check the substrate. Large format tile calls for no more than 1/8 inch of variation over 10 feet, compared with the 1/4 inch tolerance allowed for standard-size tile, so uneven concrete may require grinding or self-leveling underlayment.

02.

Remove Tile and Repair the Base

When existing flooring must come out, HEPA-filtered extraction is connected to demolition equipment and removed debris is handled in compliance with Maricopa County solid waste regulations. The exposed base is then checked for cracks, moisture, adhesive residue, damaged mortar beds, subfloor concerns, and hidden plumbing issues before repairs proceed.

03.

Plan and Square the Layout

Tile is dry-laid and chalk lines mark room center, transitions, and balanced perimeter cuts. The 3-4-5 method checks square by measuring 3 feet and 4 feet along perpendicular lines and confirming a 5-foot diagonal.

04.

Apply Mortar and Set Tile

Polymer-modified large-and-heavy tile mortar meeting ANSI A118.15 is mixed in controlled batches for Phoenix's dry conditions. A large-notch trowel, typically 3/4 inch or larger, combs the substrate while every tile is also back-buttered before placement.

05.

Level Edges and Check Coverage

Leveling clips hold neighboring edges flush while the mortar cures. Test tiles are lifted during setting to verify mortar transfer, and movement joints are positioned at perimeters, doorways, and field locations called for by the selected TCNA method.

06.

Cure, Grout, and Finish

The installation follows the mortar manufacturer's full cure time, typically 24 to 48 hours, before grouting. Sanded, unsanded, or epoxy grout is selected for the joint width and application, then tooled to a consistent, flat finish.

Plan the Installation

Schedule Your
Large Format Tile
Consultation

Discuss the tile size, material, pattern, room conditions, removal needs, and substrate concerns before work begins. Phoenix Tile Flooring can review the space and prepare a written installation estimate based on the actual scope.

Installation Help

Large Format Tile FAQs

Get practical answers about Phoenix large format tile pricing, preparation, standards, materials, setting methods, repairs, and maintenance.

Call Our Tile Team

Standard porcelain large format installation commonly runs $6.50 to $10 or more per square foot with materials and labor, while some builder-grade 24x48 scopes fall around $5.50 to $7 per square foot depending on site conditions. Higher-end porcelain, marble, or slate may reach $15 or more per square foot, and premium tile floors with full substrate preparation may fall between $16 and $20 per square foot. Phoenix Tile Flooring provides a written estimate after reviewing the space, tile, pattern, and substrate.

Start by checking flatness with a 10-foot straightedge, then dry-lay the pattern so cuts are balanced before mortar is mixed. Back-butter every tile, use leveling clips, lift test tiles to verify coverage, and allow the mortar's full cure time before grouting.

TCNA methods call for a flatter substrate than standard tile, generally no more than 1/8 inch of variation over 10 feet instead of 1/4 inch. They also address mortar coverage and movement joints, with TCNA EJ171 generally placing joints every 20 to 25 feet in large interior fields as well as at perimeters and transitions.

The 3-4-5 rule checks whether two layout lines are square: measure 3 feet on one line, 4 feet on the perpendicular line, and confirm the diagonal is exactly 5 feet. Larger rooms can use multiples such as 6-8-10 for a longer and more precise check.

Yes. Compared with standard 12x12 or 6x6 tile, oversized pieces need flatter substrates, different mortar, fuller coverage, and more precise handling. Two installers are typically needed for tile larger than 24x24 so the piece can be carried and placed without cracking or disturbing the mortar bed.

Common causes include substrate movement, hollow spots from inadequate coverage, and missing movement joints. In Phoenix homes more than a decade old, expansive soils and temperature-driven slab movement may contribute. A single tile may be replaceable when matching material is available, but widespread cracking should be traced to the substrate before repairs are made.

Grout typically needs attention every 10 to 15 years under normal residential use, although showers, wet areas, and high-traffic floors may need it sooner. An inspection can determine whether selective repair is enough or whether widespread failure calls for full removal and regrouting.

Options named for these projects include porcelain, ceramic, glass, marble, travertine, slate, and limestone. Porcelain is common for floors, showers, and patios, while natural stone needs material-specific mortar, sealing, cutting, and load evaluation.

Polymer-modified large-and-heavy tile mortar meeting ANSI A118.15 is used for tile with an edge longer than 15 inches. It is mixed to the manufacturer's slump specifications in controlled batches, because overwatering, under-mixing, and accelerated curing in Phoenix's dry heat can weaken the bond.

Yes, when the tile and assembly are rated for exterior exposure. Dark surfaces can regularly exceed 150 degrees, and monsoon storms can drop an inch of rain in under an hour, so low-water-absorption porcelain, drainage slope, UV-resistant installation materials, and movement details matter.

A HEPA-filtered vacuum connects directly to demolition equipment to help contain silica dust instead of spreading it through an occupied home or commercial space. Once the old tile is removed, the substrate can be checked for cracked mortar beds, damaged subfloor, adhesive residue, moisture, and concealed plumbing concerns.

ANSI A108.5 calls for full mortar support, verified by lifting test tiles and checking the transfer pattern during installation. The target is at least 95% contact in wet areas and 80% on dry interior residential floors.

The mortar manufacturer's stated cure time controls, and the typical range is 24 to 48 hours before grouting. Sanded, unsanded, or epoxy grout is then selected according to joint width, tile edge, traffic, and wet or dry use.